|
Installing AirPort on an Unsupported Mac
By now, just about everyone and his brother
has a wireless network. And the bug is catching... So you want
one too! Unfortunately, Apple didn't think about you when they
wrote AirPort. Or maybe they did, and they thought they could
get you to upgrade by requiring a G3 or better... Well there's
good news! The G3 requirement is absolutely artificial! Apple's
lying when they say AirPort requires a G3. AirPort works perfectly
fine with a 3400c or 2400c. You just have to get it installed...
And that's where this page comes in.
AirPort is easy to use, and if you've got a supported computer,
it's easy to install. But you don't have a supported computer...
Well read on to find out how to install AirPort 1.3.1 on your
3400c or 2400c.
FYI: Although AirPort will work
on your 3400c or 2400c, there are still some system requirements
you'll have to meet. I'll try to make this as simple as possible...
This procedure has only be tested with AirPort 1.3.1 and OS 9
- It should work with OS 8.6, but I can't certify that. And I
also cannot certify that this procedure works with AirPort 2.x.
Also, even if AirPort will run on your PowerBook, you'll still
need a supported wireless card. If your card does not say "WaveLAN"
or "ORiNOCO" anywhere on it, then IT WON'T WORK. Even
then, some of the newer ORiNOCO cards (specifically, combined
802.11a/b/g cards or CardBus cards) won't work. If you don't meet
at least these requirements, do not contact me with questions
about this procedure. I'll just delete your email if you do. Also,
this procedure does not install the help system, so AirPort
help will certainly not work for you after you've completed the
installation.
Get The Software
Start by downloading AirPort
1.3.1 from Apple. It can be found here.
You'll also need TomeViewer. You can get that from this website.
Those are the only tools you need, so you should be good to
start "hacking" now.
FYI: The Apple site download.info.apple.com
is a good resource for all sorts of forgotten goodies. Take
a look around while you're there. Apple's USB Adapter Card
Support can be installed on the 2400c and 3400c to enable
USB card support if you install it manually... |
Installing AirPort
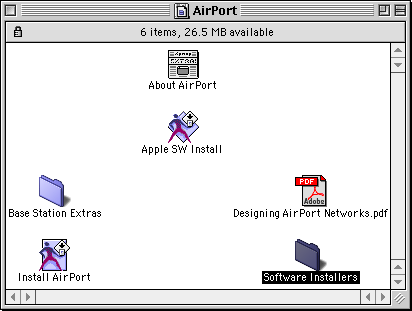
Mount the AirPort disk image
that you downloaded above. If Stuffit Expander didn't automatically
do that for you, then double click on the AirPort 1.3.1.smi
icon. A new "virtual" disk named AirPort
will appear.
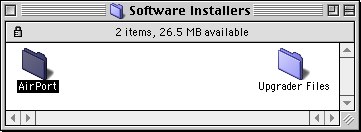
Open the AirPort disk. In that
window, open the Software Installers folder.
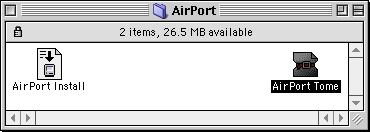
From there, open the AirPort folder.
Now use TomeViewer to open the AirPort Tome file.
If you've already downloaded
TomeViewer, you should just be able to double click on the
AirPort Tome to open it. If that doesn't work, you can drag
the AirPort Tome to TomeViewer's icon to open it. Or you can
launch TomeViewer and use the Open menu item in the File menu
to open the AirPort Tome. It doesn't really matter how you
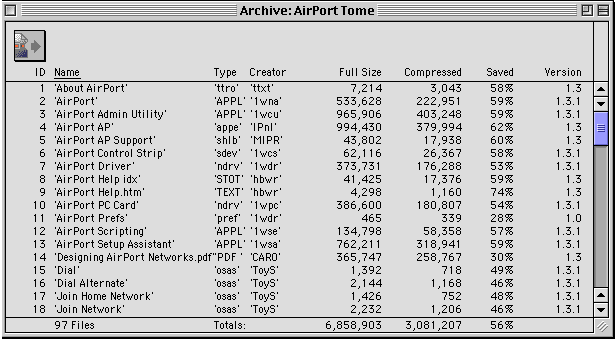
do it, so long as you manage to open the file. Once you do,
you'll get a window that looks a bit like this:
Now, holding down the
shift key, select the following:
- AirPort
- AirPort Admin Utility
- AirPort AP
- AirPort AP Support
- AirPort Driver
- AirPort PC Card
- AirPort Prefs
- AirPort Scripting
- TCP/IP Preferences
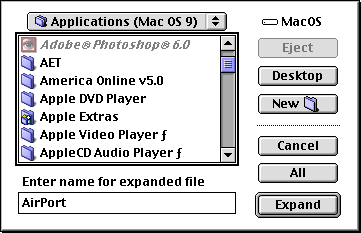
Having selected all of those, choose Expand... from
the Archive menu of TomeViewer. You'll be presented
with a series of "save" dialogs (one for each file
you are expanding) that look like this:
Expand the AirPort application somewhere logical (like
your Applications folder). Do the same with AirPort Admin
Utility. Expand AirPort AP, AirPort AP Support,
AirPort Driver, and AirPort PC Card to your
Extensions folder. Expand AirPort Prefs and TCP/IP
Preferences to your Preferences folder. Expand AirPort
Scripting to the Scripting Additions folder (found in
the System Folder). That should be all you need to get started.
The rest of the files in the AirPort Tome are either used
by the Help system or are example AppleScripts.
|
 |
Restart
|
Now all you need to do to use your fancy new software is restart
your PowerBook. See, now that wasn't so hard, was it? ;-)
|
Configure
Of course, the software is
no good if you don't know how to use it. The first thing to
try is to see if you card is recognized as an AirPort PC Card.
Insert your wireless card. It should appear on the desktop
having the name AirPort PC Card and show the following
icon.
If that doesn't happen,
then either you didn't install AirPort correctly or your card
isn't supported. Assuming it did work correctly, you'll now
want to open your AirPort application to set up your
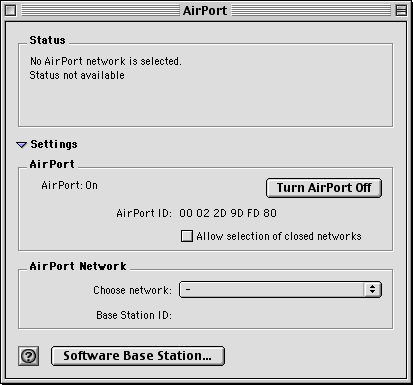
network connection. Having opened the AirPort application,
you'll see a window something like this:
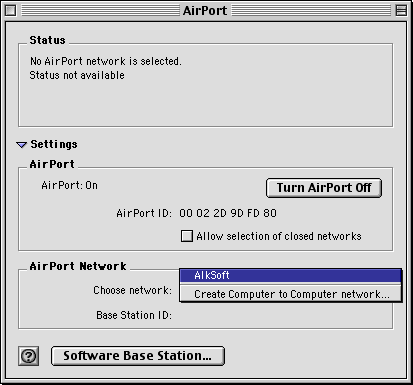
In that window, pick your network's
name from the Choose network: menu. My network's name
is "AlkSoft", so that's the network I picked. Every
base station has a manner of set up. This page won't help
you to configure your base station - you'll have to read the
manual for that.
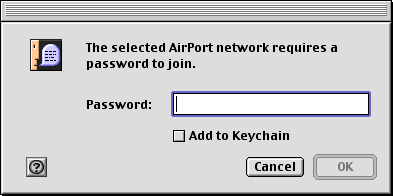
If your network uses WEP encryption like mine, you'll be asked
for the password now. For AirPort base stations, this password
can be entered in as you would enter any other password. If
you're using a 3rd party base station, you'll need the hex
key. Preceed the hex key with "0x"
(the 0x tells AirPort that the password you are entering is
hex and not regular text).
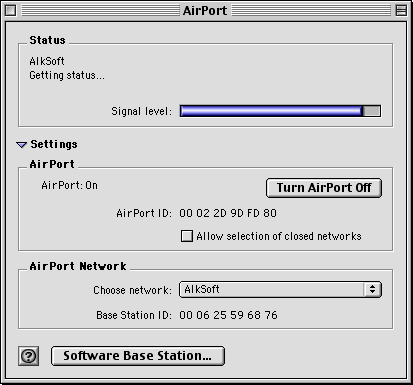
If you entered the password
correctly (or your network doesn't require a password), your
AirPort window will now look something like this:
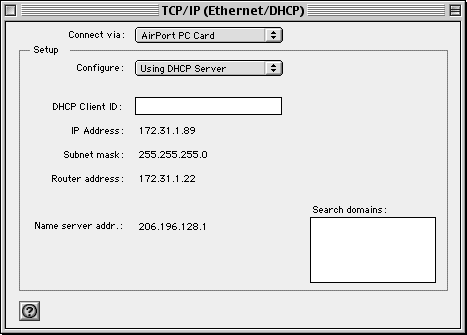
Now that you're connected, the
last step is to set up TCP/IP to use the wireless network.
That's pretty easy: Just open your TCP/IP control panel
and set Connect via: to AirPort PC Card. The
rest of the settings are the traditional TCP/IP settings -
most likely you'll pick Using DHCP Server and let them
be configured by your base station.
Now you're done! Sit back on
your lawn chair with a good margarita or cold beer, and enjoy
wireless Internet access on your unsupported PowerBook in
your back yard! Enjoy! I know I do...
|
|
|

![]()
